
How to Write and Publish Your First Post in EmDash
Write a post in EmDash's editor, save it as a draft, and publish it. We did it on EmDash 1.4, and these are the real screens, including the one step people miss.
 By the AstroBeginner team. Reviewed by Ankur Gandhi, VP of WordPressPublished 6 minute readComplete beginner
Tested on Astro 7.4
In this guide
This is the part EmDash was built for: writing on your website without touching code. We wrote and published a post on a fresh EmDash 1.4 site on November 8, 2026. Here’s every step, with the real screens.
Step 1: Open your posts
Go to your dashboard. On your own computer, that’s localhost:4321/_emdash/admin. In the menu on the left, click Posts.
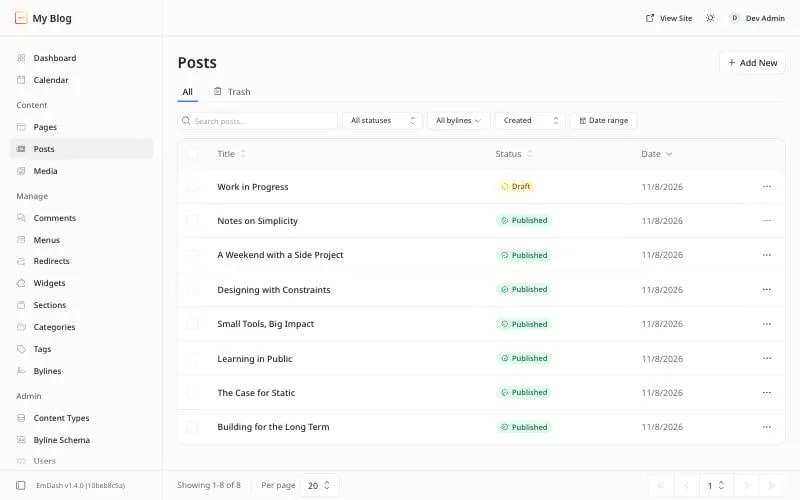
If you picked sample content during setup, you’ll see eight example posts already. One is a draft, so you can see how drafts look.
Step 2: Start a new post
Click Add New at the top right. You get an empty post with a Title box, a place for a Featured Image, and a big Content area.
Type a title. Watch the Slug box on the right fill in by itself. The slug is the end of the post’s web address. “My First Post” became my-first-post.
Step 3: Write
Click in the Content area and type. It works like any word processor.
To add a heading, a list, an image or a quote, start a new line and type a slash, /. A menu pops up:
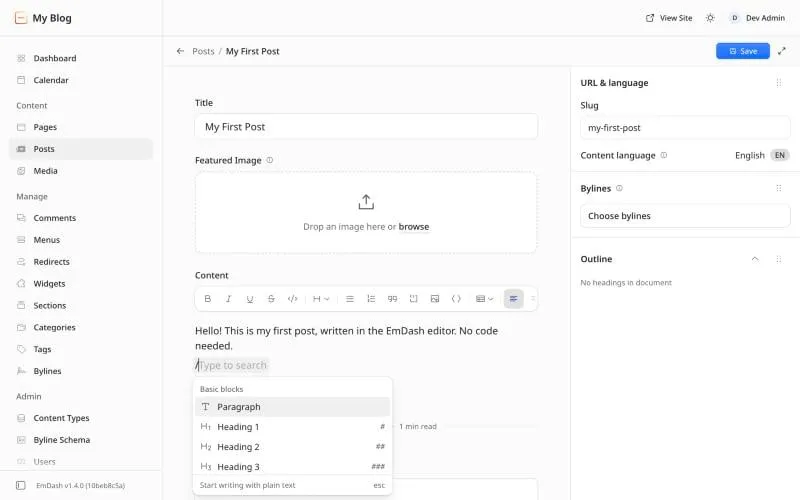
Pick Heading 2 for a section title, then press Enter to go back to normal text. The toolbar above the content does the same things with buttons, if you’d rather click.
Step 4: Save it as a draft
Click Save at the top right. Your post is saved, but nobody can see it yet. The right side now shows a lot more:
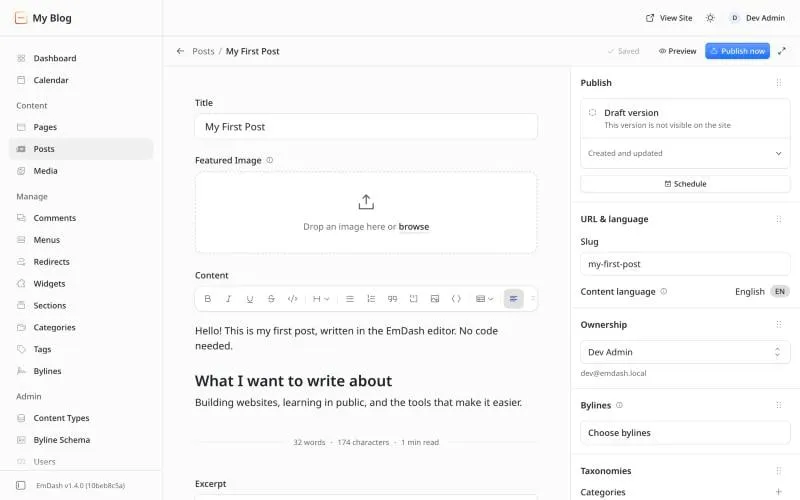
That side panel is where everything else lives:
- Publish says whether this is a draft or live, and has the Schedule button.
- URL & language holds the slug.
- Taxonomies is where you pick categories and tags.
- SEO has boxes for the title and description Google shows, and a share image. No plugin needed.
- Revisions keeps older versions, so you can go back.
Step 5: Publish it
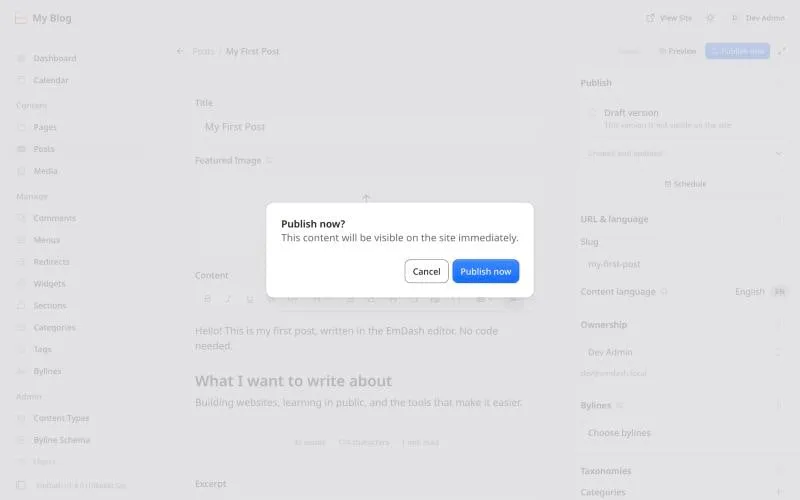
Click Publish now at the top right. A small box pops up:
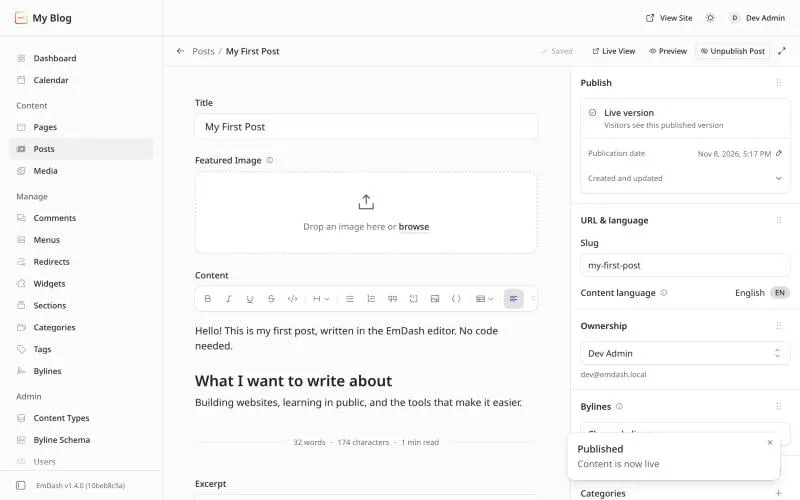
When it works, a message says Published, Content is now live, and the panel changes to Live version:
Step 6: See it on your site
Click Live View at the top, or go to /posts/my-first-post on your site.
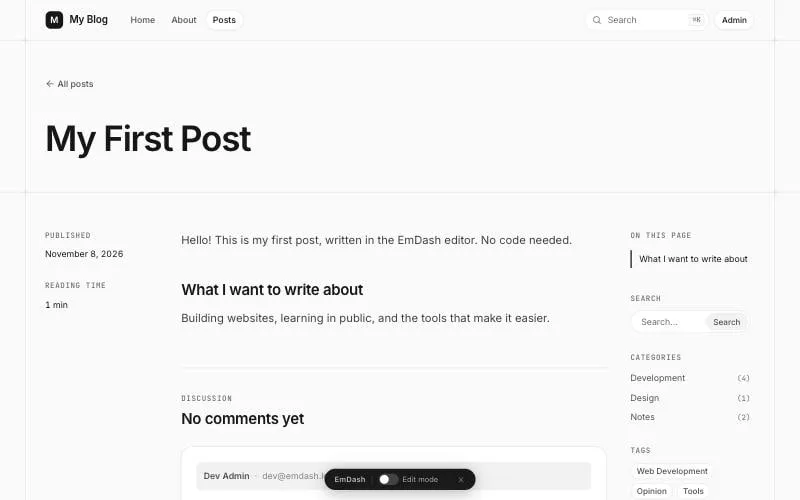
The blog template did the rest: the date, the reading time, a table of contents from your headings, and a comments section underneath. You can see the same template’s posts live on our demo site.
Changing or removing a post later
- To change it: open it from Posts, edit, and click Save. Then click Publish again to make the change live. Until you do, visitors see the old version.
- To take it down: click Unpublish Post at the top. It goes back to being a draft.
- To delete it: scroll to the bottom of the side panel and click Move to Trash. Trash keeps it for a while in case you change your mind.
Where to go next
- A tour of the EmDash dashboard, every menu item explained.
- EmDash’s four templates compared, if you want a different look.
- How to put EmDash online with Cloudflare.
Frequently asked questions
Why does my published post show "Page not found"?
The Publish now button opens a small box that asks you to confirm. Until you click Publish now in that box, the post is still a draft, and drafts don't show on your site.
Can I schedule a post for later?
Yes. After you save, the Publish panel on the right has a Schedule button. Pick a date and time. On a live site, EmDash publishes it for you.
Do I need to know Markdown?
No. The editor works like a word processor. Type a slash to add headings, lists, images and more.
Stuck on a step?
Check the common errors guide, look up a word in the glossary, or ask the friendly people in the official Astro and EmDash Discords. How to ask so people can help.